Before you start
When you registered, Absensi-Q prepared a starting setup for your company type. You may already have departments and job positions. Review them first. Change only what does not fit your company.
| Term | What it means |
|---|---|
| Department | A team or part of the company, such as Kitchen or Finance. |
| Job position | A seat in a department. It joins a department with a job title, and it can report to another position. |
| Job title | The name of a job, such as Cashier or Manager. |
| Hierarchy | A chart that shows which position reports to which. It is built from the parent position that you choose for each job position. |
Swipe sideways to see the whole table.
Each employee is given one job position, so create the positions before you add employees.
Add or change a department
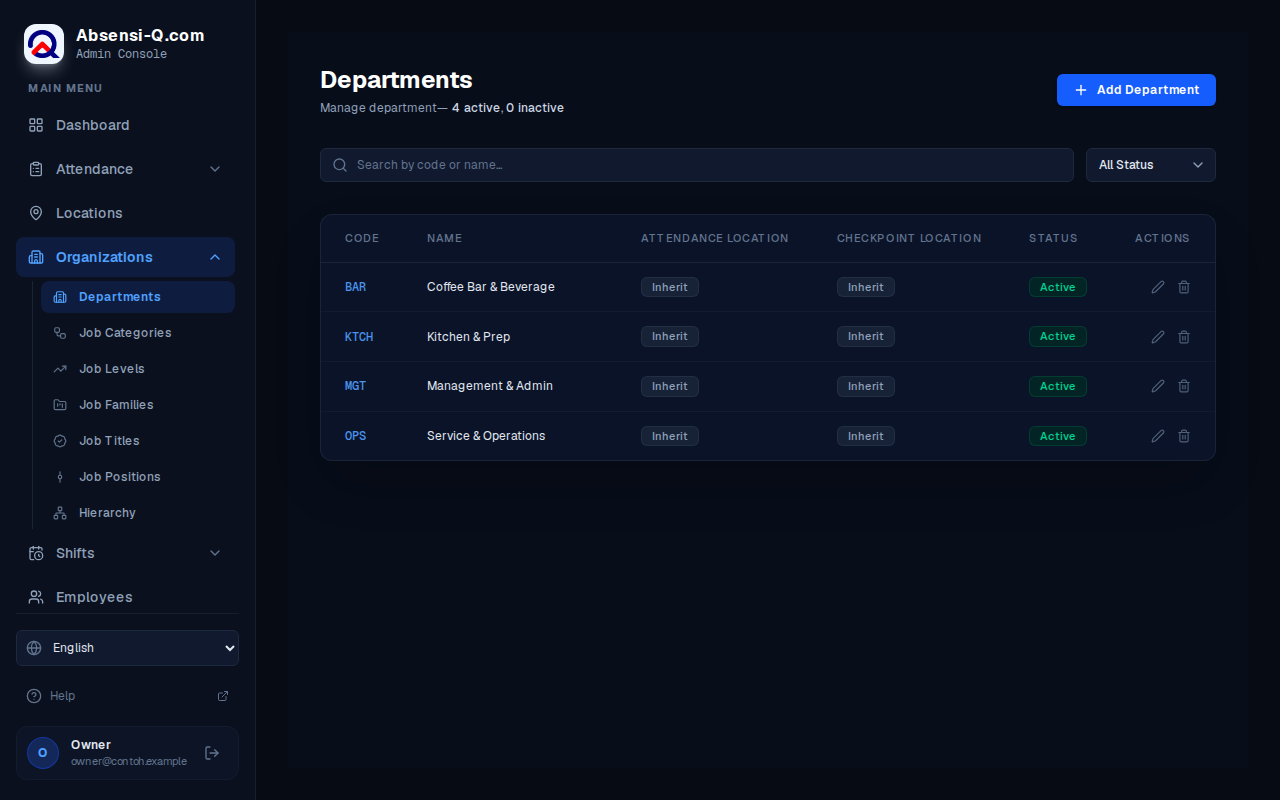
- In the menu, open Organizations, then Departments.
- Press Add Department. To change a department, press its edit button instead.
- Type a Code and a Name. The code is a short name, for example FIN.
- Choose the Status. Use Active for departments that you use now.
- If you want, choose a Default Roster Pattern. A roster pattern is a repeating work schedule. Employees in this department follow it unless their position has its own pattern. Leave it as Not Set if you are not sure.
- Choose the Attendance Location. This decides where employees may clock in. The choices are described below.
- Press Save Changes.
| Attendance Location | What it means |
|---|---|
| Inherit | Use the setting of the level above. For a department, this means Fixed. |
| Fixed (inside geofence) | Employees can clock in and clock out only inside the clock-in area of their location. |
| Flexible (anywhere) | Employees can clock in and clock out from anywhere. |
Swipe sideways to see the whole table.
A job position or an employee can use a different choice. The most specific choice wins: the employee first, then the job position, then the department. If every level says Inherit, the result is Fixed.
Add or change a job position
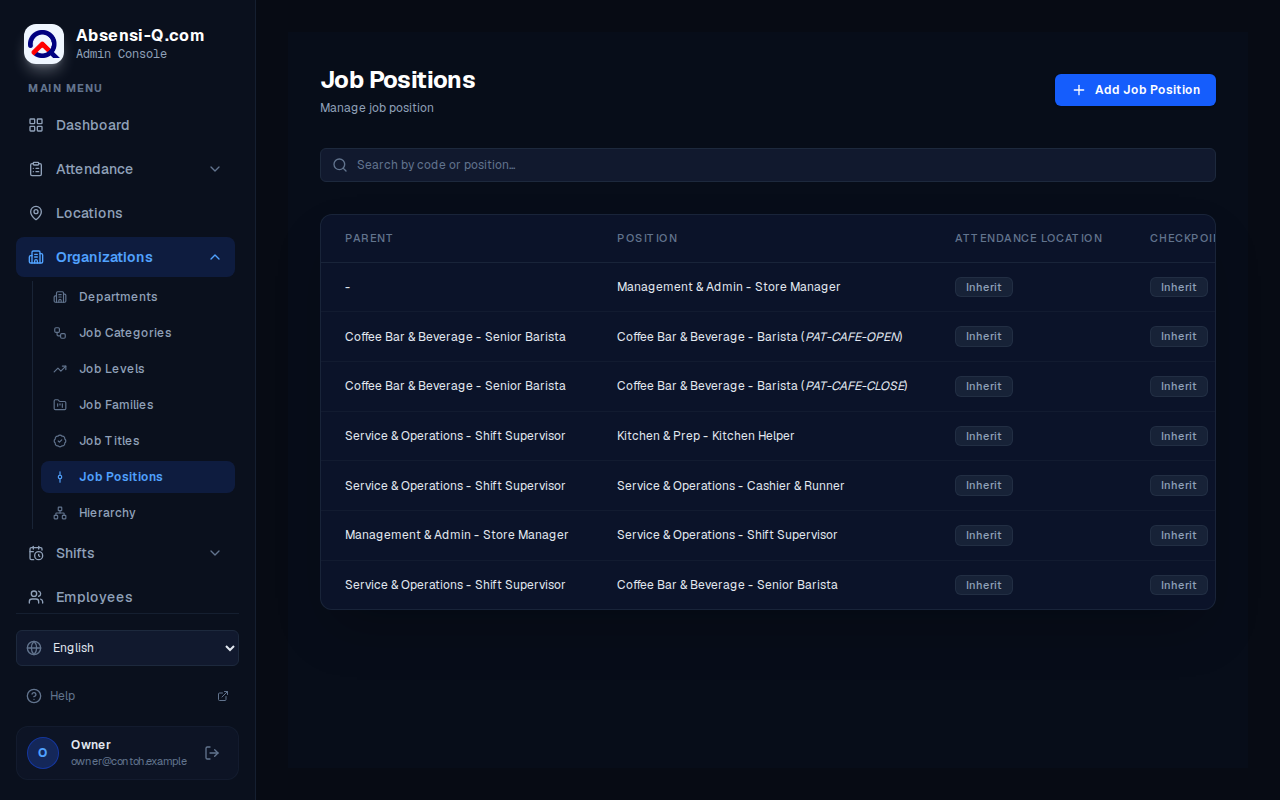
- In the menu, open Organizations, then Job Positions.
- Press Add Job Position.
- Choose the Department and the Job Title.
- Choose the Parent. This is the position that this position reports to. Choose (Top Level Position) for the highest position.
- If you want, choose a Default Roster Pattern and the Attendance Location for this position.The roster pattern of a position replaces the pattern of its department.
- Press Save Changes.
Job titles and their building blocks
A job title needs a job family and a job level. A job level needs a job category. The starting setup already contains them. If you need a new job title that does not fit, create the parts in this order:
- Job Categories: a broad group of jobs, with a code, a name and a description.
- Job Levels: the rank of a job, such as junior or senior, with a Level Rank and a job category.
- Job Families: a group of related jobs.
- Job Titles: the job name, with a job family and a job level.
All of these pages are under Organizations in the menu. They work in the same way: press the add button, fill in the form, then press Save Changes.
See the hierarchy
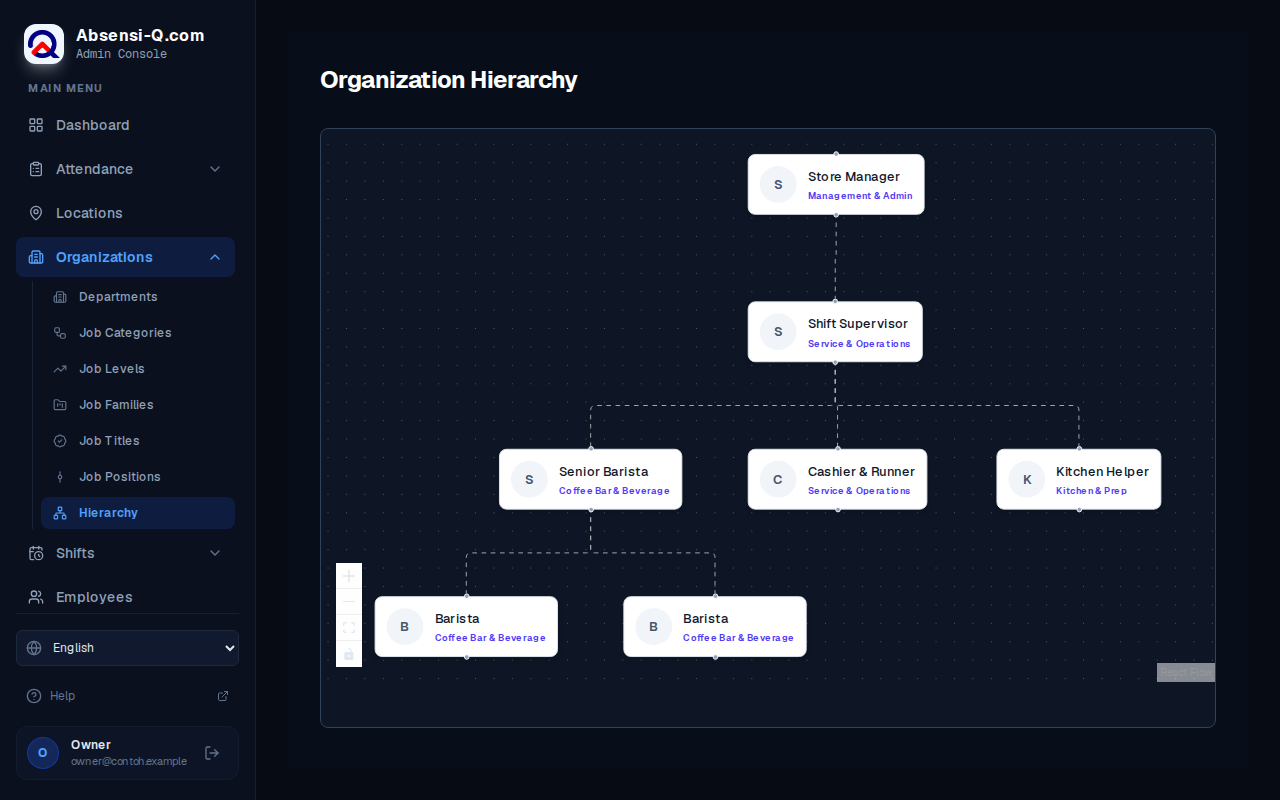
- In the menu, open Organizations, then Hierarchy.
- The chart Organization Hierarchy shows every position as a box. Lines connect each position to the one it reports to.
- Use the buttons Zoom in, Zoom out and Fit view to move around the chart.
The hierarchy changes when you change the Parent of a job position. Everyone who uses the portal can see this page. Only owners and admins can see the other organization pages.
If something goes wrong
| What you see | What to do |
|---|---|
| No departments found matching your criteria. | Clear the search box and set the status filter to All Status. |
| The Hierarchy chart is empty. | Create at least one job position under Job Positions, then open the Hierarchy page again. |
| You deleted a department or position by mistake. | The deletion cannot be undone. Create it again with the same details. |
Swipe sideways to see the whole table.