Before you start
You need at least one job position. The starting setup from registration already has some. If you changed them, check the guide on the organization.
- Add the work location of the employee first. Employees clock in at their location.
- Have the employee's email address ready. The invitation is sent there. Each email can belong to only one employee.
- Your plan limits how many active employees you can have. Only employees whose status is Active count toward the limit.
Add an employee
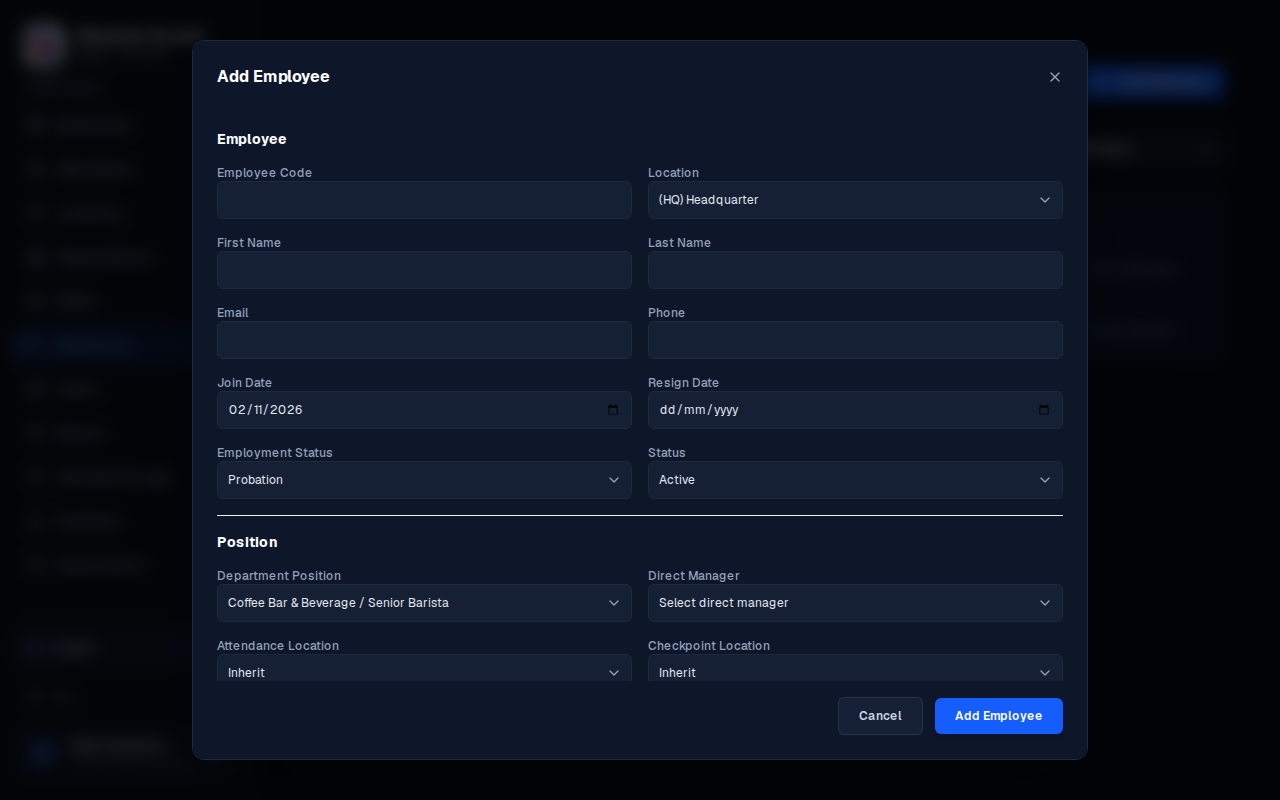
- In the menu, open Employees, then press Add Employee. A form opens.
- In the part Employee, type the Employee Code and the First Name. These two are required. Add the Last Name, the Email and the Phone if you have them.The employee code is a number or short name that you choose to identify the employee.
- Choose the Location where the employee works.
- Choose the Employment Status: Permanent, Contract, Probation or Intern.
- Choose the Status. Choose Active for a person who works now.
- Choose the Join Date.The join date matters. For a department or position that has a roster pattern, the schedule of the employee starts counting from the Monday of the week of the join date.
- In the part Position, choose the Department Position. This is required. You can also choose a Direct Manager.
- Choose the Attendance Location. This decides where the employee may clock in: Inherit, Fixed (inside geofence) or Flexible (anywhere). Inherit uses the job position first, then the department. The default is Fixed.
- The parts Profile and Payroll are optional. You can leave them empty for now.
- Press Add Employee at the bottom of the form. The employee appears in the list.
Invite the employee to the app
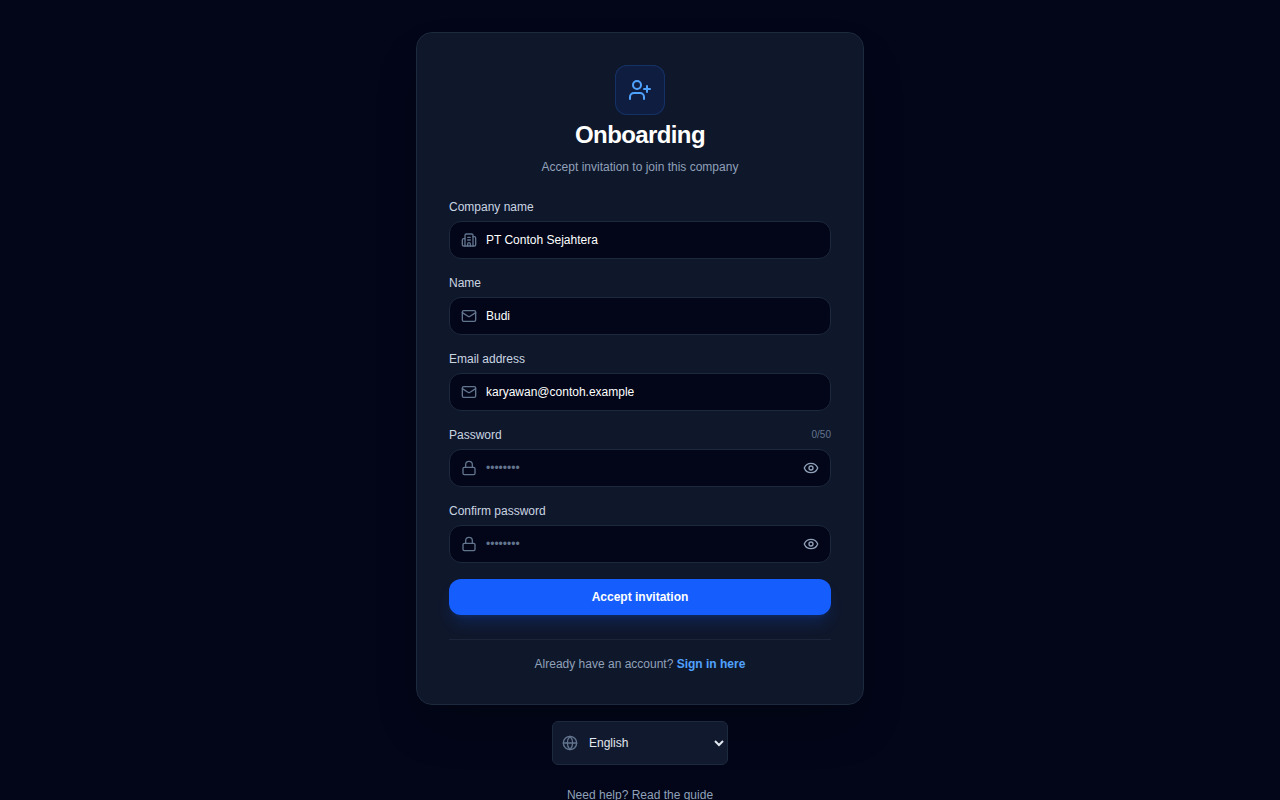
An employee cannot use the app until you invite the employee. The invitation is an email with a link. When the employee accepts it, the employee gets a sign-in for the employee app.
- In the list Employees, find the employee. The employee must have an email address.
- Press Send Invitation in the row of the employee.If you press it again later, a new email with a new link is sent.
- Ask the employee to open the email and press the link. The link works for 7 days and only once.
- The employee sees the page Onboarding, with the company name and the employee's name. The employee types a Password and Confirm password, then presses Accept invitation.If the employee already has an Absensi-Q account from another company, the employee types the current password instead.
- When the invitation is accepted, the row of the employee shows LINKED instead of the button.
Find and change an employee
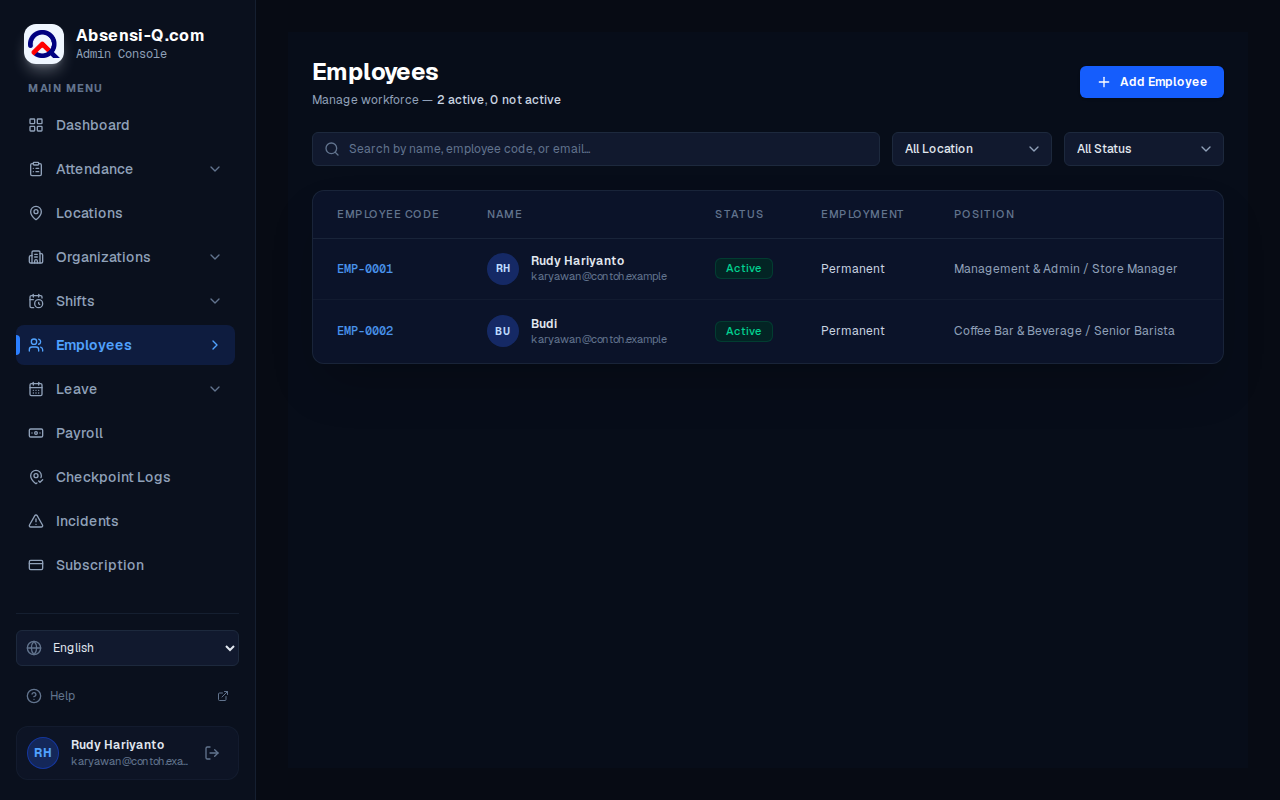
- To find an employee, type a name, an employee code or an email in the search box. You can also choose a location in All Location or a status in All Status.
- Press the edit button in the row of the employee.
- Change what you need, then press Save Changes.
The list also shows the attendance location of each employee and the badge LINKED for employees who can already use the app.
When an employee leaves
| Status | When to use it |
|---|---|
| Active | The person works now. This status counts toward your plan limit. |
| Inactive | The person is away for a while or you want to stop counting them. You can make them Active again later. |
| Resigned | The person left on their own. A Resign Date is required. |
| Terminated | The company ended the employment. |
Swipe sideways to see the whole table.
If something goes wrong
| What you see | What to do |
|---|---|
| You've reached your plan's employee limit. Upgrade your plan to add more. | Set employees who have left to Inactive, or change your plan. See the guide on the subscription. |
| The employee cannot be saved because the email already belongs to another employee. | Check the email. Each email can belong to only one employee. |
| The employee did not receive the invitation. | Check that the email address is correct and ask the employee to look in the spam folder. Then press Send Invitation again. |
| The employee says the invitation link does not work. | The link may be older than 7 days or may have been used already. Press Send Invitation again to send a new link. |
| The employee cannot sign in after accepting. | Check that the employee opens the employee app, not the portal. See the guide for employees. |
Swipe sideways to see the whole table.